Commercial Products
Open Source
Enterprise Ehcache Installation
Introduction
This document shows you how to add Terracotta clustering to an application that is using Ehcache.
To set up the cluster with Terracotta, you will add a Terracotta JAR to each application and run a Terracotta server array. Except as noted below, you can continue to use Ehcache in your application as specified in the Ehcache documentation.
To add Terracotta clustering to an application that is using Ehcache, follow these steps:
Step 1: Requirements
- JDK 1.6 or higher.
- Terracotta 3.7.0 Download the kit and run the installer on the machine that will host the Terracotta server.
- All clustered objects must be serializable. If you cannot use Serializable classes, you must use an identity cache with a custom installation (see Terracotta DSO Installation). Identity cache, which requires DSO, is not supported with this installation.
Step 2: Install the Distributed Cache
For guaranteed compatibility, use the JAR files included with the Terracotta kit you are installing. Mixing with older components may cause errors or unexpected behavior.
To install the distributed cache in your application, add the following JAR files to your application's classpath:
${TERRACOTTA_HOME}/ehcache/lib/ehcache-terracotta-ee-<version>.jar<version> is the current version of the Ehcache-Terracotta JAR.${TERRACOTTA_HOME}/ehcache/lib/ehcache-core-ee-<ehcache-version>.jar- The Ehcache core libraries, where
is the current version of Ehcache (2.4.3 or higher). ${TERRACOTTA_HOME}/ehcache/lib/slf4j-api-<slf4j-version>.jarThe SLF4J logging facade allows Ehcache to bind to any supported logger used by your application. Binding JARs for popular logging options are available from the SLF4J project. For convenience, the binding JAR forjava.util.loggingis provided in${TERRACOTTA_HOME}/ehcache(see below).${TERRACOTTA_HOME}/ehcache/lib/slf4j-jdk14-<slf4j-version>.jarAn SLF4J binding JAR for use with the standardjava.util.logging.${TERRACOTTA_HOME}/common/terracotta-toolkit-<API-version>-runtime-ee-<version>.jarThe Terracotta Toolkit JAR contains the Terracotta client libraries. <API-version> refers to the Terracotta Toolkit API version. <version> is the current version of the Terracotta Toolkit JAR.
If you are using the open-source edition of the Terracotta kit, no JAR files will have "-ee-" as part of their name.
If you are using a WAR file, add these JAR files to its WEB-INF/lib directory.
Most application servers (or web containers) should work with this installation of Enterprise Ehcache. However, note the following:
|
Step 3: Configure the Distributed Cache
The Ehcache configuration file, ehcache.xml by default, must be on your application's classpath. If you are using a WAR file, add the Ehcache configuration file to WEB-INF/classes or to a JAR file that is included in WEB-INF/lib.
Create a basic Ehcache configuration file called ehcache.xml:
<?xml version="1.0" encoding="UTF-8"?>
<ehcache name="myCache"
xmlns:xsi="http://www.w3.org/2001/XMLSchema-instance"
xsi:noNamespaceSchemaLocation="ehcache.xsd">
  <defaultCache
     maxElementsInMemory="0"
     eternal="false"
     timeToIdleSeconds="1200"
     timeToLiveSeconds="1200">
         <terracotta />
  </defaultCache>
  <terracottaConfig url="localhost:9510" />
</ehcache>
This defaultCache configuration includes Terracotta clustering. The Terracotta client must load a Terracotta configuration (separate from the Ehcache configuration) from a file or a Terracotta server. The value of the <terracottaConfig /> element’s url attribute should contain a path to that file or to the address and DSO port (9510 by default) of a server. In the example value, "localhost:9510" means that the Terracotta server is on the local host. If the Terracotta configuration source changes at a later time, it must be updated in configuration. For more information on configuring <terracottaConfig>, see the configuration reference.
| In a Terracotta cluster, the application server is also known as the client. |
Add Terracotta to Specific Caches
For any cache that should be clustered by Terracotta, add the sub-element <terracotta /> to that cache's <cache> block in ehcache.xml. For example, the following cache is clustered with Terracotta:
<cache name="myCache" maxElementsInMemory="1000"
      maxElementsOnDisk="10000" eternal="false" timeToIdleSeconds="3600"
      timeToLiveSeconds="0" memoryStoreEvictionPolicy="LFU">
 <!-- Adding the element <terracotta /> turns on Terracotta clustering for the cache myCache. -->
 <terracotta />
</cache>
See Controlling Cache Size for information on using configuration to tune memory and disk storage limits.
Edit Incompatible Configuration
For any clustered cache, you must delete, disable, or edit configuration elements that are incompatible when clustering with Terracotta. Clustered caches have a <terracotta> or <terracotta clustered="true"> element.
The following Ehcache configuration attributes or elements should be deleted or disabled:
- DiskStore-related attributes
overflowToDiskanddiskPersistent. The Terracotta server automatically provides a disk store. - Replication-related attributes such as
replicateAsynchronouslyandreplicatePuts. - The attribute
MemoryStoreEvictionPolicymust be set to either LFU or LRU. SettingMemoryStoreEvictionPolicyto FIFO causes the errorIllegalArgumentException.
Step 4: Start the Cluster
Start the Terracotta server:
UNIX/Linux
${TERRACOTTA_HOME}/bin/start-tc-server.sh &Microsoft Windows
${TERRACOTTA_HOME}\bin\start-tc-server.bat- Start the application servers.
Start the Terracotta Developer Console:
UNIX/Linux
${TERRACOTTA_HOME}/bin/dev-console.sh &Microsoft Windows
${TERRACOTTA_HOME}\bin\dev-console.bat- Connect to the Terracotta cluster.
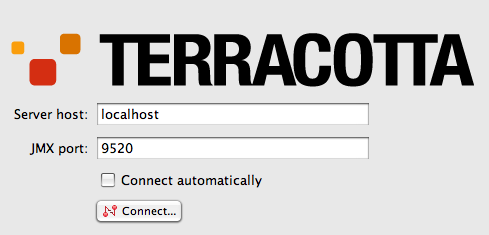
Click Connect... in the Terracotta Developer Console.
- Click the Ehcache node in the cluster navigation window to see the caches in the Terracotta cluster. Your console should have a similar appearance to the following annotated figure.

Step 5: Edit the Terracotta Configuration
This step shows you how to run clients and servers on separate machines and add failover (High Availability). You will expand the Terracotta cluster and add High Availability by doing the following:
- Moving the Terracotta server to its own machine
- Creating a cluster with multiple Terracotta servers
- Creating multiple application nodes
These tasks bring your cluster closer to a production architecture.
Procedure:
- Shut down the Terracotta cluster.
Create a Terracotta configuration file called
tc-config.xmlwith contents similar to the following:<servers> <!-- Sets where the Terracotta server can be found. Replace the value of host with the server's IP address. --> <server host="server.1.ip.address" name="Server1"> <data>%(user.home)/terracotta/server-data</data> <logs>%(user.home)/terracotta/server-logs</logs> </server> <!-- If using a standby Terracotta server, also referred to as an ACTIVE-PASSIVE configuration, add the second server here. --> <server host="server.2.ip.address" name="Server2"> <data>%(user.home)/terracotta/server-data</data> <logs>%(user.home)/terracotta/server-logs</logs> </server> <!-- If using more than one server, add an <ha> section. --> <ha> <mode>networked-active-passive</mode> <networked-active-passive> <election-time>5</election-time> </networked-active-passive> </ha> </servers> <!-- Sets where the generated client logs are saved on clients. Note that the exact location of Terracotta logs on client machines may vary based on the value of user.home and the local disk layout. --> <clients> <logs>%(user.home)/terracotta/client-logs</logs> </clients> </tc:tc-config>Install Terracotta 3.7.0 on a separate machine for each server you configure in
tc-config.xml.- Copy the
tc-config.xmlto a location accessible to the Terracotta servers. - Perform Step 2: Install the Distributed Cache and Step 3: Configure the Distributed Cache on each application node you want to run in the cluster. Be sure to install your application and any application servers on each node.
- Add the following to the Ehcache configuration file,
ehcache.xml: - Copy
ehcache.xmlto each application node and ensure that it is on your application's classpath. If you are using a WAR file, add the Ehcache configuration file toWEB-INF/classesor to a JAR file that is included inWEB-INF/lib. Start the Terracotta server in the following way, replacing "Server1" with the name you gave your server in
tc-config.xml:UNIX/Linux
${TERRACOTTA_HOME}/bin/start-tc-server.sh -f <path/to/tc-config.xml> -n Server1 &Microsoft Windows
${TERRACOTTA_HOME}\bin\start-tc-server.bat -f <path\to\tc-config.xml> -n Server1 &If you configured a second server, start that server in the same way on its machine, entering its name after the
-nflag. The second server to start up becomes the "hot" standby, or PASSIVE. Any other servers you configured will also start up as standby servers.Start all application servers.
- Start the Terracotta Developer Console and view the cluster.
Step 6: Learn More
To learn more about using Terracotta Ehcache distributed cache, start with the following document:
To learn more about working with a Terracotta cluster, see the following documents:
- Working with Terracotta Configuration Files – Explains how
tc-config.xmlis propagated and loaded in a Terracotta cluster in different environments. - Terracotta Server Arrays – Shows how to design Terracotta clusters that are fault-tolerant, maintain data safety, and provide uninterrupted uptime.
- Configuring Terracotta Clusters For High Availability – Defines High Availability configuration properties and explains how to apply them.
- Terracotta Developer Console – Provides visibility into and control of caches.